Stock Receive Workflow
The Stock Receive process is a critical operation in the Warehouse Management System (WMS) that ensures all incoming inventory is properly logged, reviewed, and prepared for storage. This process consists of multiple stages designed to track and validate each stock receipt.
Flowchart Overview
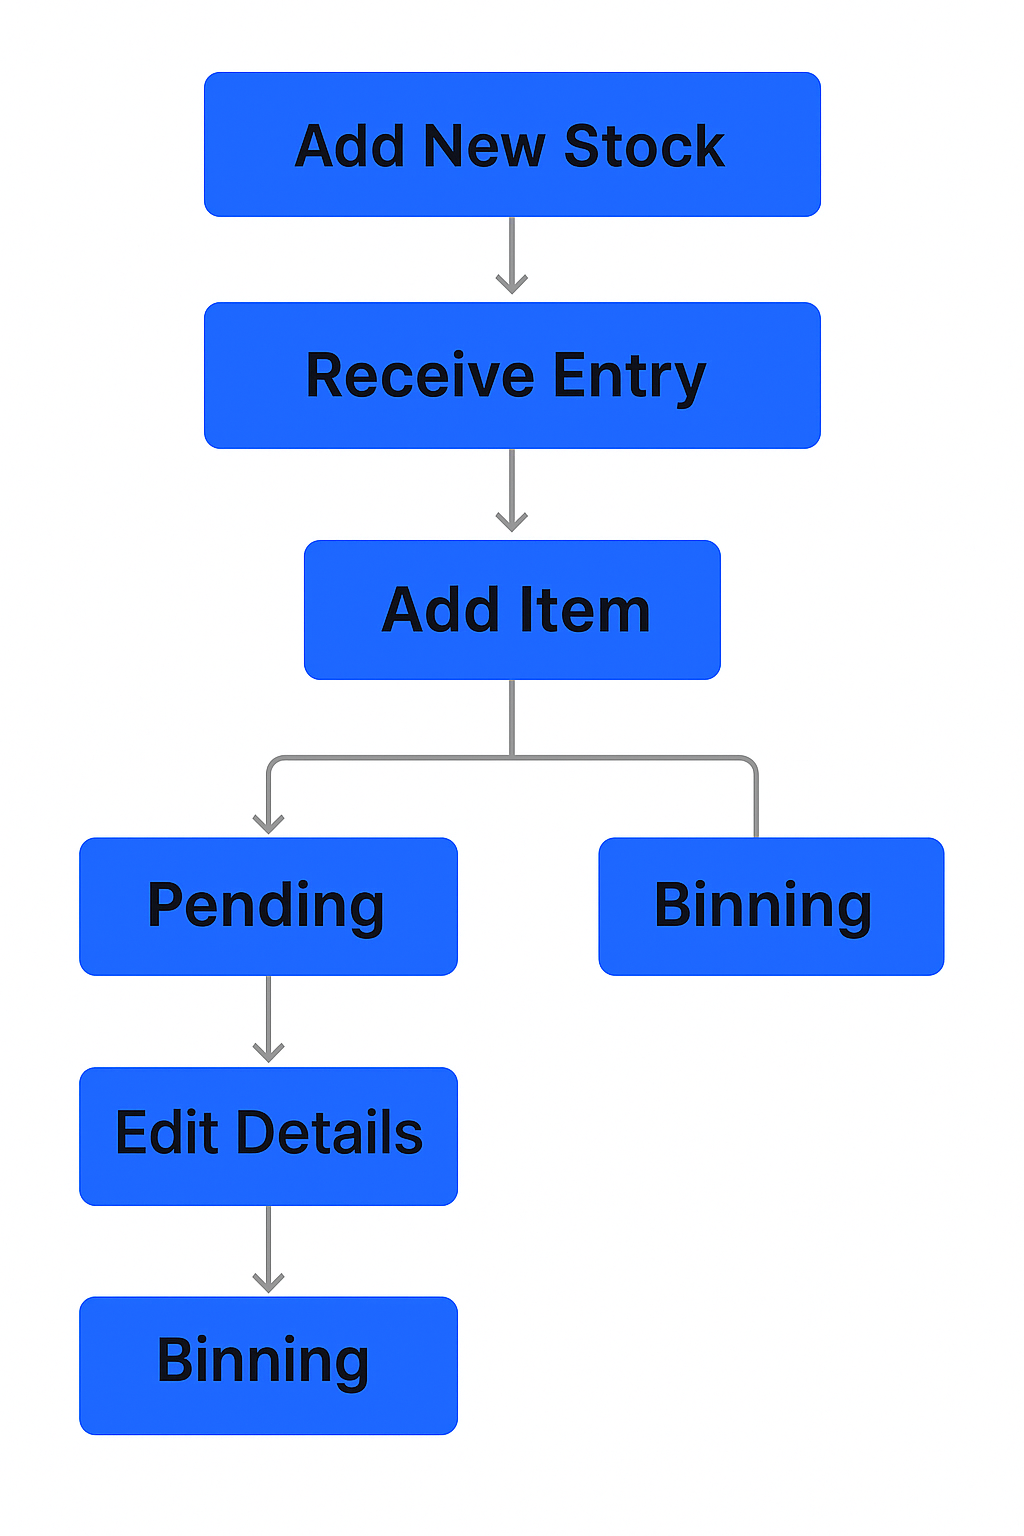
The flowchart below visually represents the Stock Receive workflow, showing two main branches after adding item details: Pending (editable) and Binning (finalized).
Step-by-Step Process
1. Initiate a New Entry
Begin by clicking the Add New button on the Stock Receive screen. Enter the following key fields:
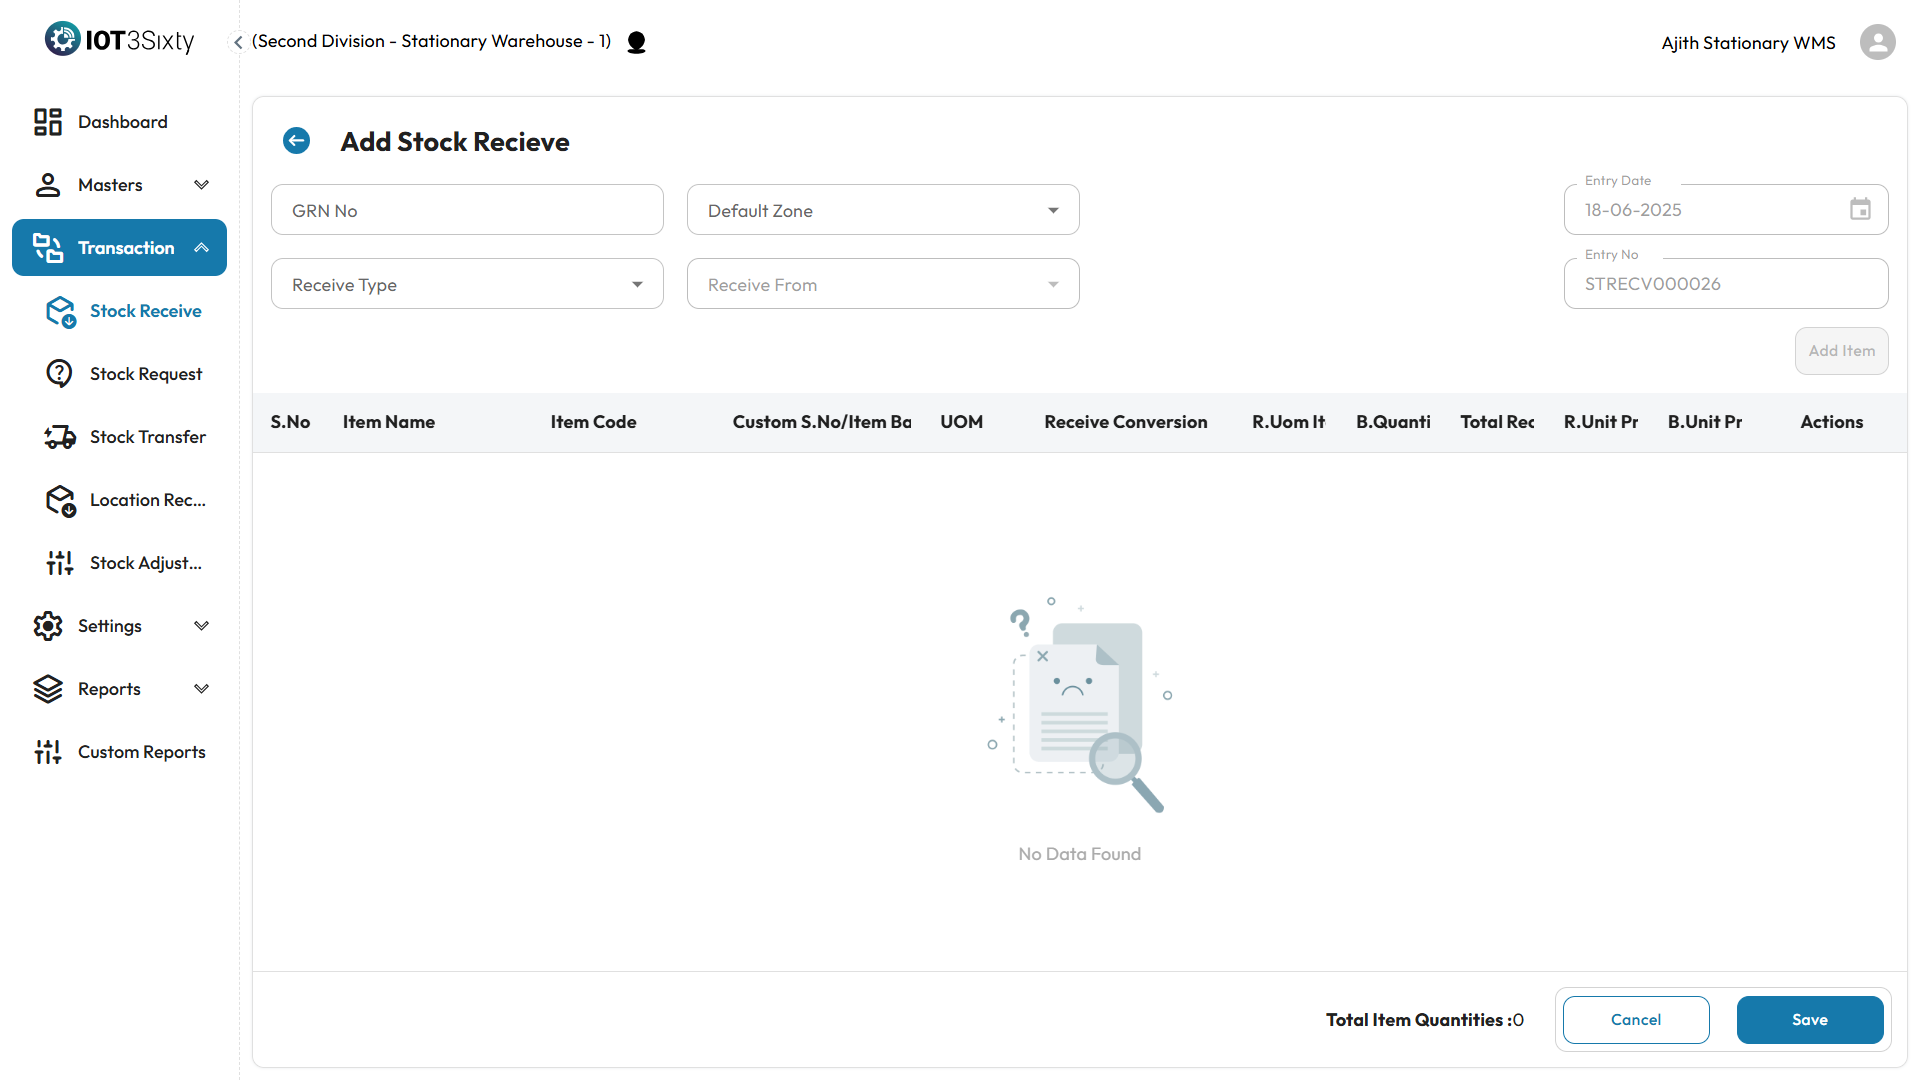
- GRN Number – A unique Goods Receipt Note, either auto-generated or manually entered.
- Default Zone – A temporary area for holding stock before it's assigned to storage.
- Receive Type – Select the nature of the receipt (e.g., purchase, transfer).
- Receive From – Choose the supplier or internal source.
2. Add Items to the Entry
Click Add Item to include individual inventory lines. For each item, enter:
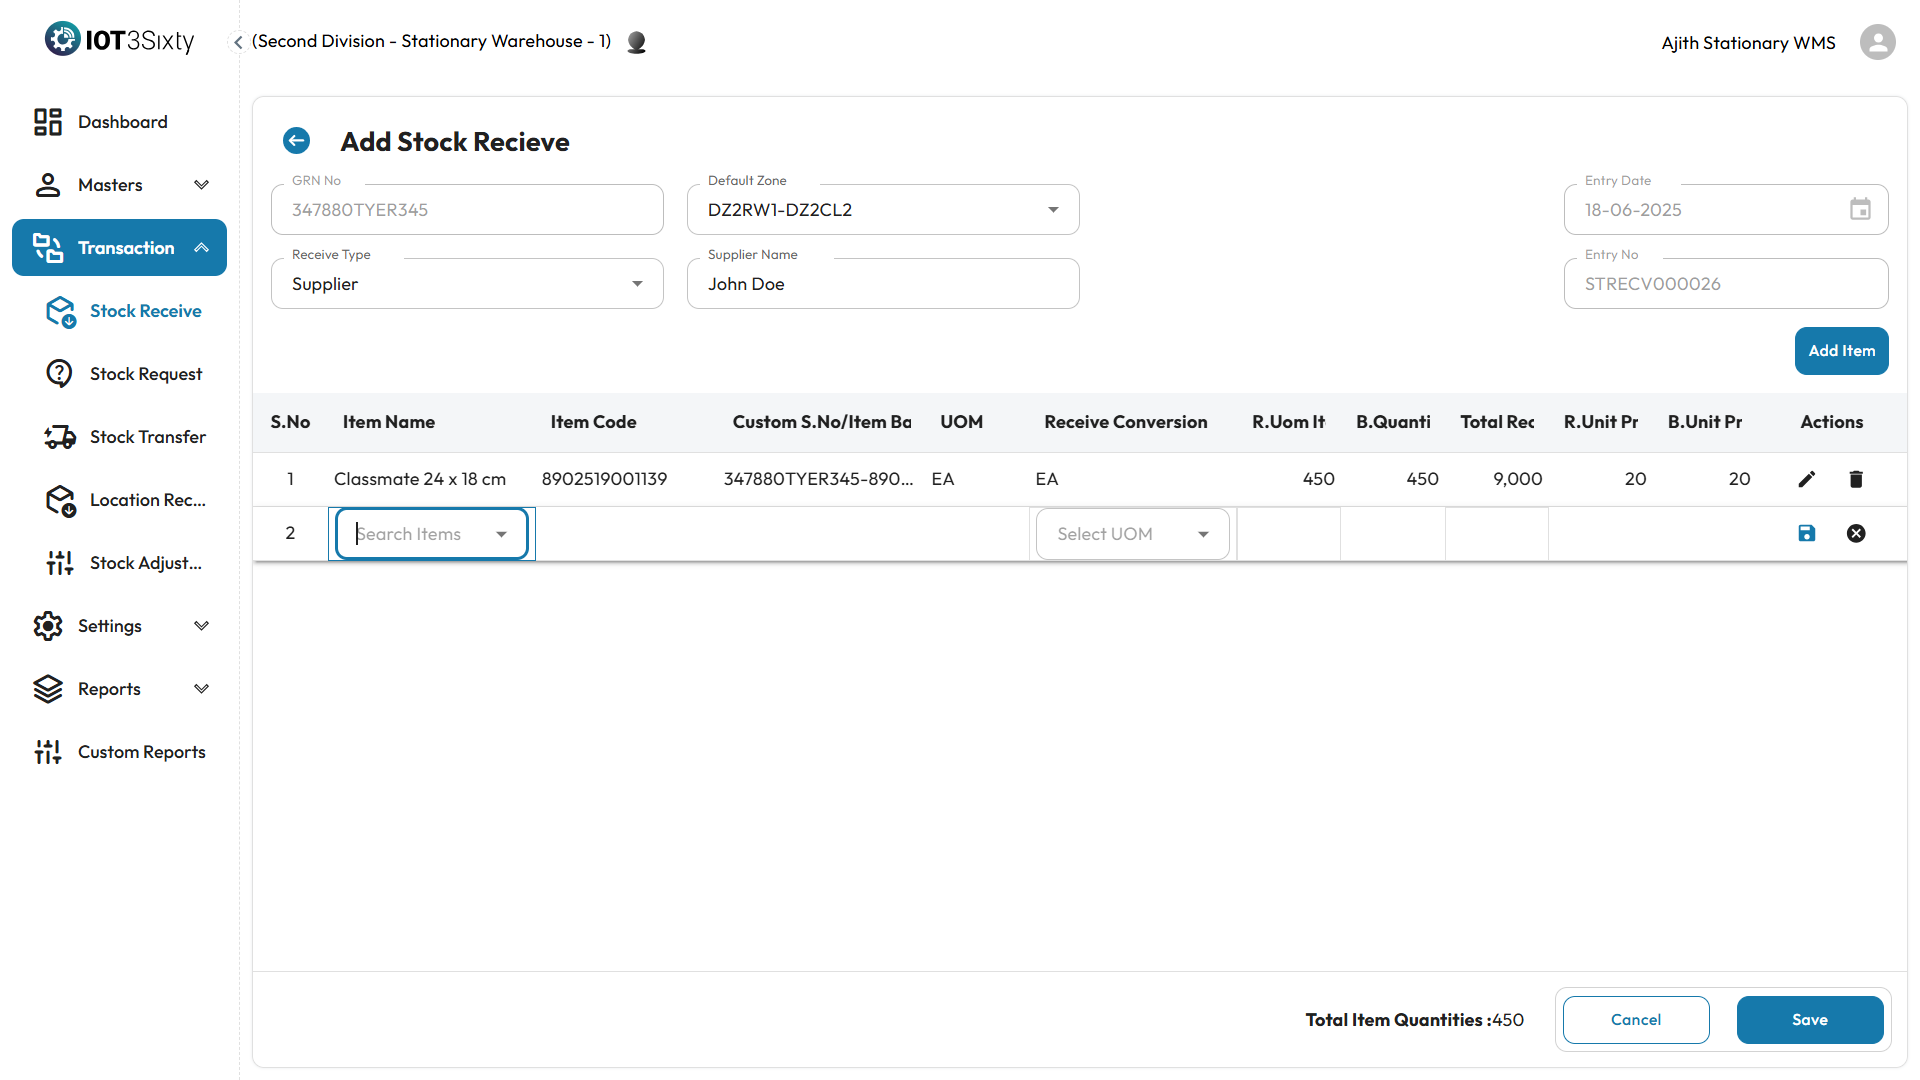
-
Item Name, Item Code, and Barcode (or custom serial number).
-
Base UOM – The standard unit of measure for the item.
-
Receive UOM – The unit used during this receipt, which can be different.
-
Quantity in Receive UOM
-
Receive Unit Price and Base Unit Price
-
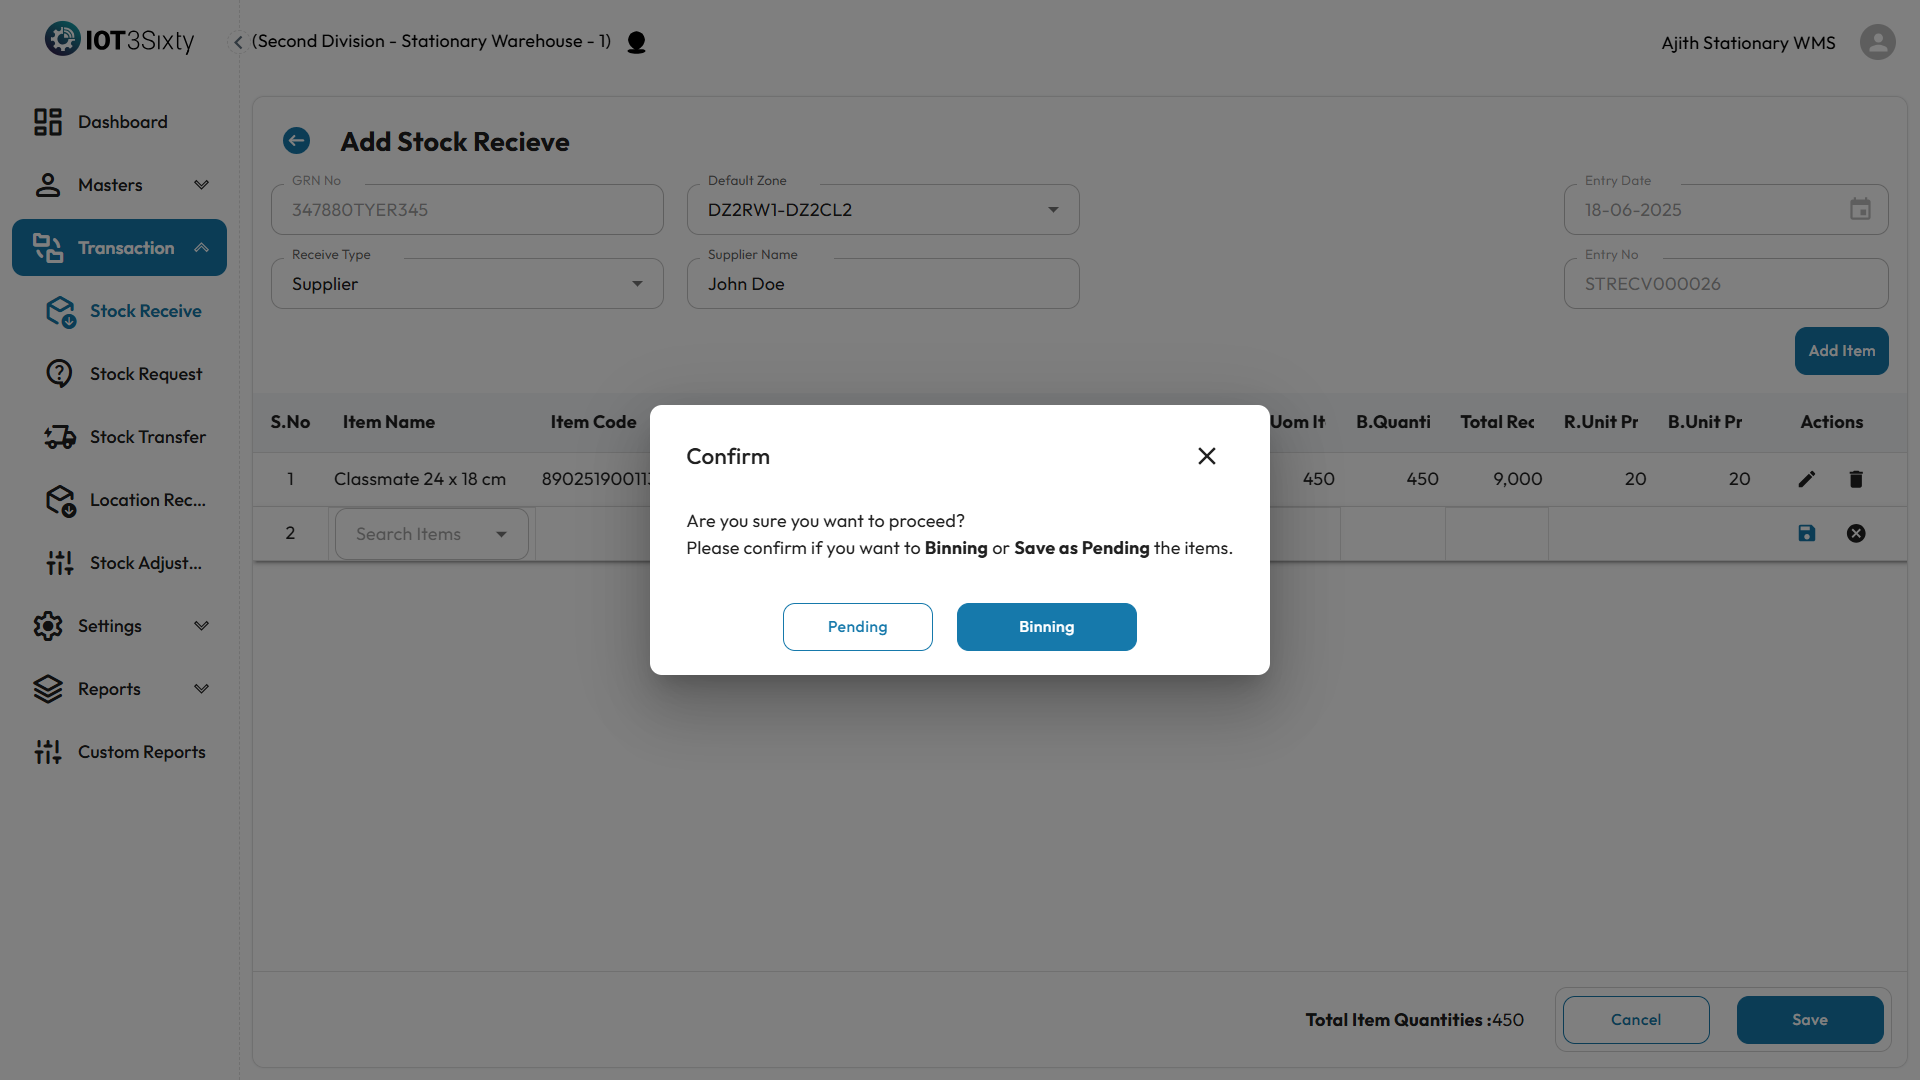
Click save button
-
After tat a dialog box appears,
The system will auto-fill known fields such as item code, base UOM, and barcode when an item is selected.
Workflow Branches After Adding Items
Once item details are added, the entry follows one of two branches:
🔹 A. Pending State
- The entry is stored in Pending status.
- You can edit or update the item quantities, prices, and other details.
- This allows for correction of errors or late updates before confirming receipt.
🔹 B. Binning State
- After reviewing and confirming, you move the entry to the Binning stage.
- At this stage, the inventory is ready for physical allocation to storage bins.
- Editing is disabled after binning begins.
Binning represents a final step where received goods are moved to designated locations in the warehouse.
Summary & Finalization
After binning:
- You will be presented with a summary screen showing all items and their quantities.
- Review the totals and confirm the data.
- Click Save to complete the Stock Receive process.
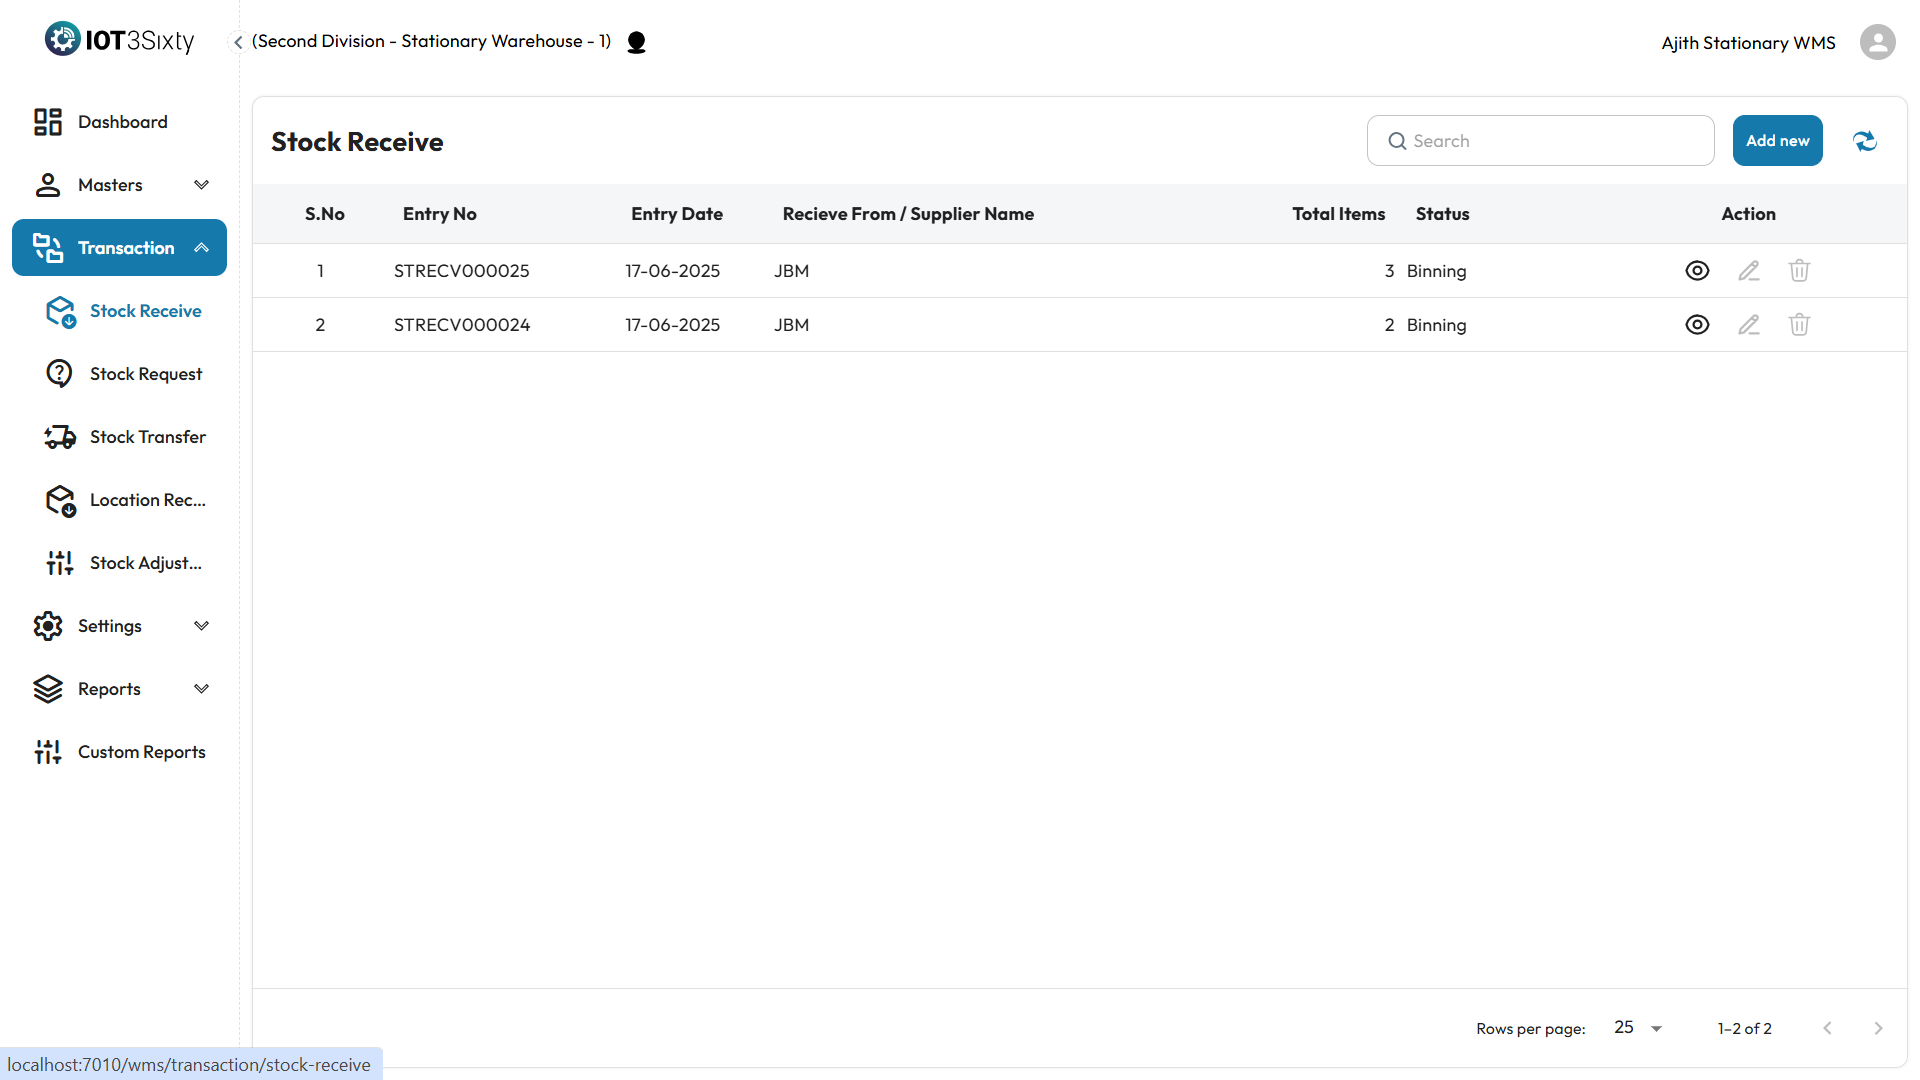
On the Listing Page
Once entries are created, they appear in the Stock Receive list with the following fields:
- Entry Number
- Entry Date
- Received From / Supplier Name
- Total Items
- Status: Indicates whether the record is Pending or Binning.
- Actions:
- Edit for Pending entries.
- View for Binning entries.
Final Notes
- Default Zone acts as a temporary staging area for new receipts.
- The clear separation between Pending and Binning ensures data accuracy and operational control.
- Always confirm item-level and pricing details before finalizing.
Would you like me to help write the next WMS module documentation (e.g., Stock Transfer or Reports)?