User Setup
User Setup allows administrators to create and manage user accounts in the system. Users are assigned roles that control their permissions, and are mapped to specific projects and locations.
User creation is handled from the Settings > User Management section.
Steps to Create a User
1. Navigate to User Settings
- Go to Settings > User Management.
2. Click the "Add New" Button
- Click the Add New button to open the User Creation Form.
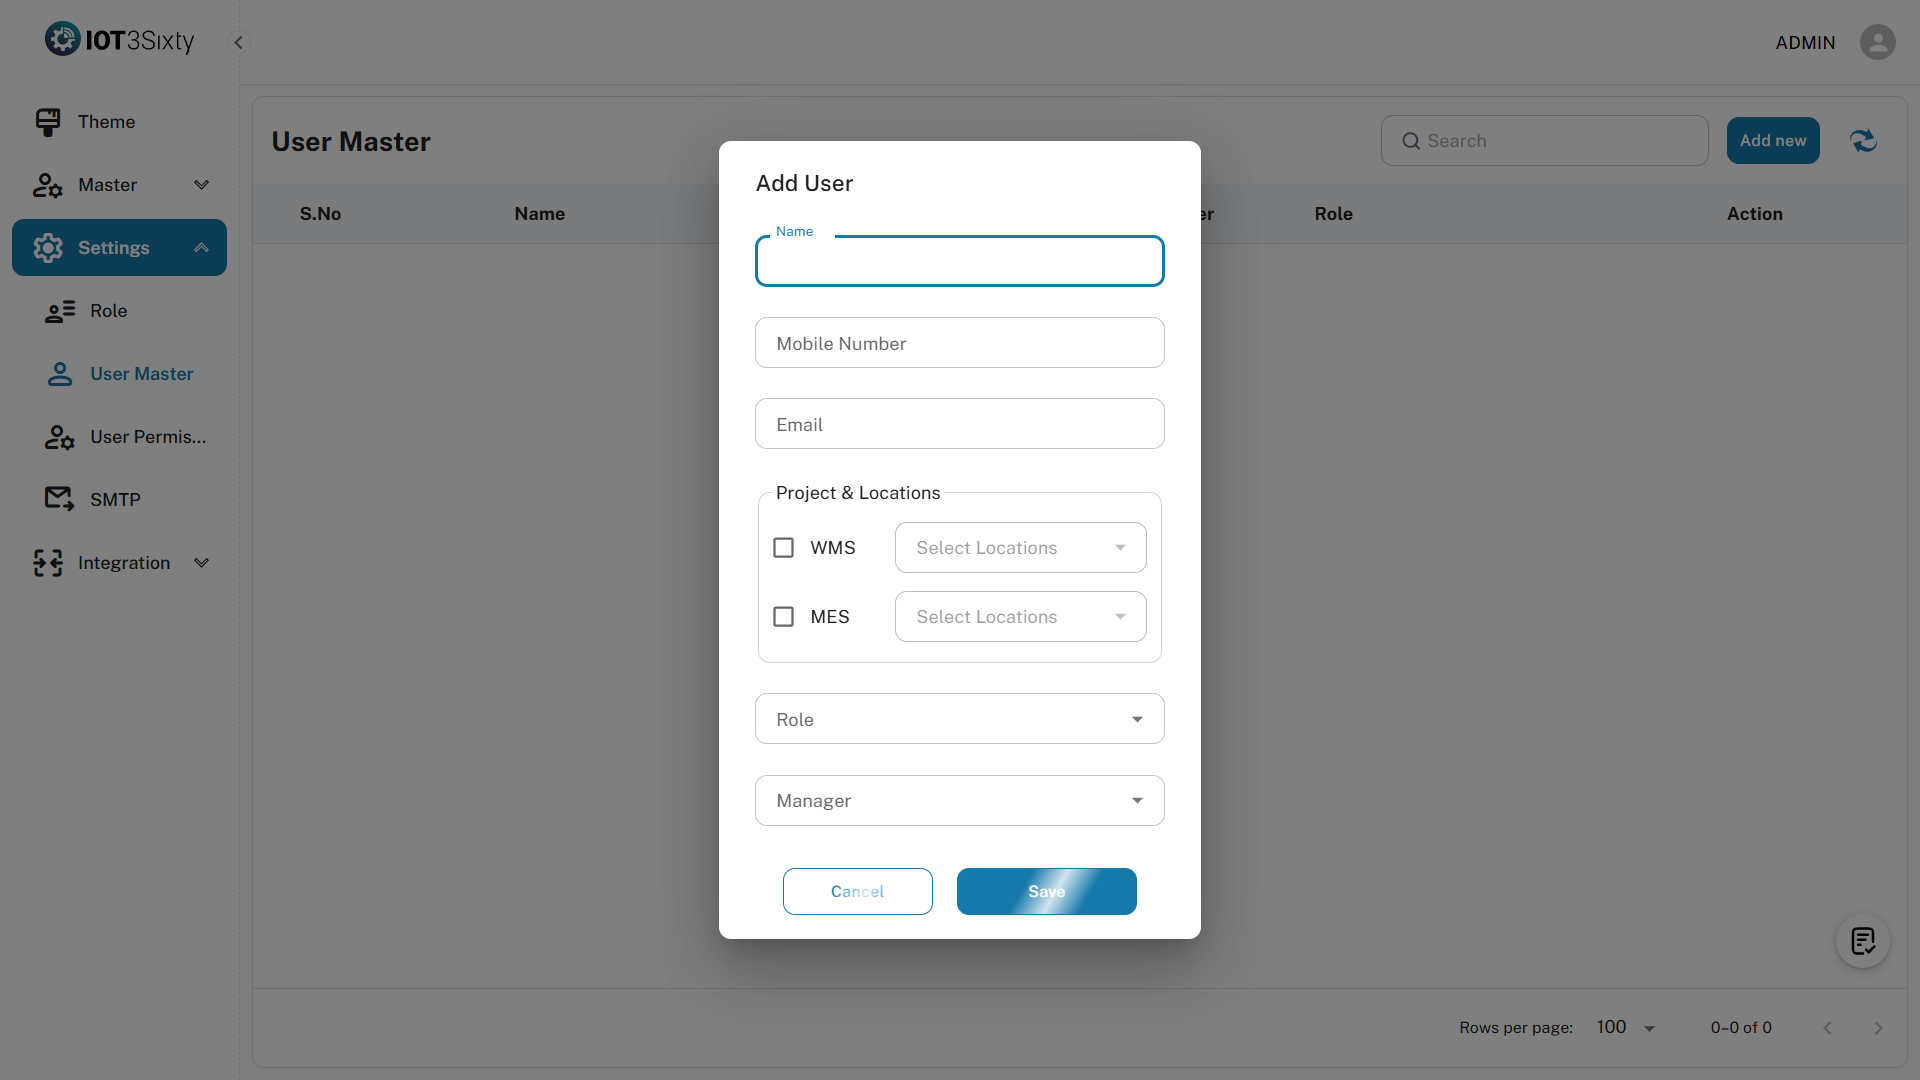
3. Fill in User Details
| Field | Type | Required | Description |
|---|---|---|---|
| Name | Text | Yes | Full name of the user |
| Mobile Number | Number | Yes | Valid mobile number for communication |
| Yes | User's email address (used for login and notifications) | ||
| Project | Dropdown | Yes | Select the project the user is assigned to |
| Location | Dropdown | Yes | Select the user's default location |
| Role | Dropdown | Yes | Assign the appropriate role to define permissions |
| Manager | Dropdown | Optional | Optionally assign a reporting manager from existing users |
4. Save the User
- After filling in all required fields, click Save.
5. Confirmation
- You will receive a message:
USER CREATED SUCCESSFULLY
Checklist Behavior
- Once a user is successfully created, the User step in the Onboard Process is marked as Completed.
- If all steps in the Onboard Process are completed, the "Don't Show Again" button will be enabled.
Notes
- Email addresses must be unique and valid.
- Mobile numbers are used for communication and must follow the correct format.
- The selected role will control access across the system.
- The location helps tailor user data visibility based on geography or department.
- Assigning a manager helps structure organizational hierarchy.
Best Practices
- Use corporate email addresses for all user accounts.
- Ensure that roles are pre-configured before assigning them.
- Use descriptive names and proper mapping for projects and locations.
- Regularly review and update inactive users to maintain system hygiene.